It is possible, but of course we should not expect professional photos, though... I had the idea to write this little tutorial for ones are new to photography or just to show that we can capture some nice photos to our family album even in the night when we left the camera at home. I always saying a nicely captured low quality photo is much better than a missed one.
So the most important is the right timing, as you know the iPhone (and other phones and cheaper point and shoot cameras) are not the kings of the night. So we need to take these photos during the first half of the blue hour to have enough ambient light and colors to capture.
As you may know, there are two blue hours a day, in the morning and in the night. You can find out this time frame at your location using www.bluehoursite.com or the iPhone app, available here. The blue hour effect is stronger during the beginning so try to make the photos early. Later the sky will be too dark for the phone and the little dynamic range will result of burned out light spots, lots of dark areas and high noise.
Noise is the biggest issue with the photos currently. I did not test the iPhone 4S yet, but the iPhone 3G and iPhone 4 has relatively high noise. The iPhone 4 higher resolution helps a bit to reduce this though.
During the capture try to frame the scene as you wish and then tap on the screen to adjust focus and light meter to a relatively darker part to keep the balance on the image. If you taking image of some brighter lights then it may need to tap on this, to prevent burning in. If the lights are too bright you will lose all the details around it.
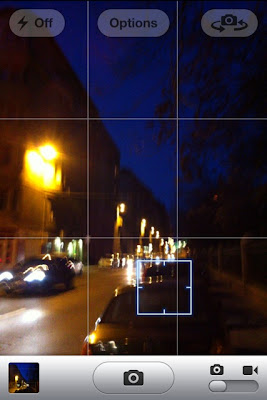 |
| tap on a darker area before shoot. Sorry for the blur, not easy to hold steady while taking a screen shot :) |
According to my experience the white balance and other settings are just right as you take the photo, no adjustments needed. The noise will be high so you may want to reduce it with a noise reduction software. There is an option to this right in iPhoto on Mac, it has a relatively good results. You need to pick some higher values but always check the results and fine tune if needed.
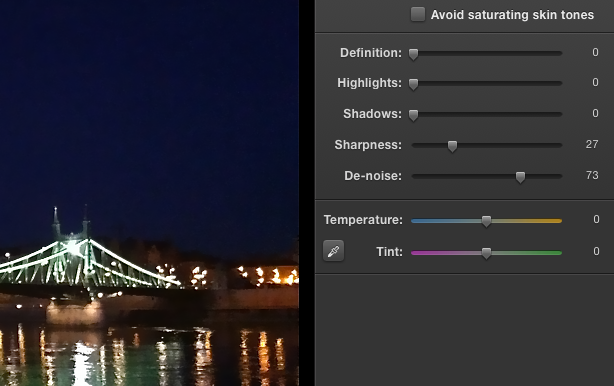 |
| Adjust Sharpness and De-noise sliders. |
|
 |
| Results from iPhoto |
There are other alternatives, like
Noise Ninja (trial, win+mac),
NDNoise (free, win+mac),
Neat Image (trial, win+mac). These softwares can produce nice results but of course it is not magic.
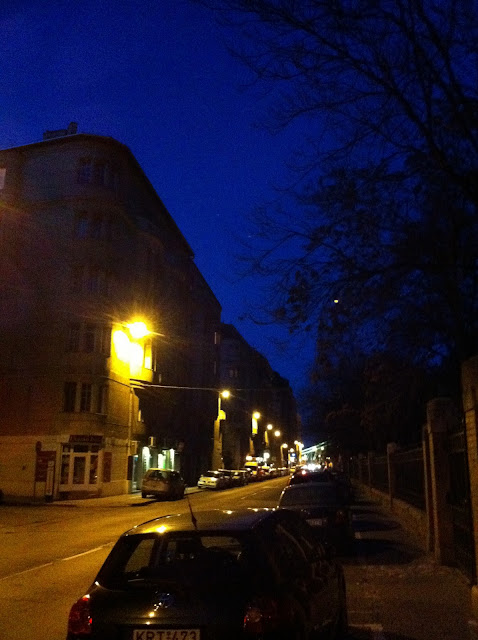 |
| untouched, taken with iPhone 4 |


